Creating a photography studio at home is no longer just a dream for professionals—it’s now an achievable reality for amateurs, hobbyists, and freelancers alike. With a strategic setup, a small space in your house can be transformed into a fully functional studio for portraits, product photography, and creative shoots. However, before diving into the world of softboxes and seamless backdrops, it’s crucial to understand what equipment and considerations are truly essential.
This guide breaks down everything you need to get your home photography studio off the ground, without overspending or sacrificing quality.
Why Build a Home Photography Studio?
Setting up a home photography studio offers creative control, convenience, and long-term cost savings. Whether you’re shooting clients, building your portfolio, or working on personal projects, a dedicated studio space lets you work on your own terms.
Benefits include:
- No rental fees for studio time
- Schedule flexibility for shoots
- Control over lighting and other conditions
- Privacy and comfort for both you and your subjects
A home setup doesn’t require a mansion. With the right planning and tools, even a spare bedroom or garage can serve as a powerful creative workspace.
How Much Space Do You Need?
The first thing to consider is your available space. You don’t need an enormous room to create a functional studio. The key is understanding your photography goals and adjusting accordingly.
Space considerations:
- Portraits: At least 10×12 feet to allow room for backdrops and lighting
- Product photography: A tabletop and about 5×5 feet of space can be enough
- Full-body fashion shoots: Ideally, a space at least 15×20 feet
Tips:
- Clear clutter and designate the area for studio use only
- Use collapsible or portable equipment if space is tight
- Consider installing blackout curtains to control ambient light
Lighting: The Heart of Your Home Studio
Lighting can make or break a photo. Fortunately, you don’t need high-end Hollywood gear to get professional results at home. There are several lighting options depending on your budget and style.
Types of Lighting to Consider:
- Natural Light
- Free and flattering
- Best near large windows
- Use white curtains to diffuse harsh sunlight
- Continuous Lights (LEDs or CFLs)
- Show constant illumination
- Great for beginners and video work
- Budget-friendly and easy to use
- Strobe Lights/Flashes
- Professional-level lighting
- Better for freezing motion and controlling exposure
- More expensive and require light modifiers
Essential Lighting Gear:
- Softboxes or umbrellas to soften shadows
- Reflectors to bounce light onto the subject
- Light stands and clamps for support and positioning
Invest in at least one key light and one fill light. Over time, you can build a three-light setup that includes a backlight or hair light for extra depth.
What Backdrops Work Best for Home Photography?
Backgrounds are key to setting the mood, especially for portrait, fashion, or product shoots. Your backdrop doesn’t need to be expensive, but it should be adaptable.
Common Backdrop Options:
- Seamless paper: Clean, professional look; disposable
- Muslin or cloth: Washable, reusable, portable
- Vinyl: Durable and easy to clean (great for product photography)
- DIY options: Use curtains, wooden panels, or painted walls
Backdrop Essentials:
- Backdrop stand or wall mount
- Clamps or clips to keep the material taut
- A storage solution to avoid wrinkles and dust
Aim for neutral colors like white, gray, or black when starting out, then expand into textured or colored backgrounds as your style evolves.
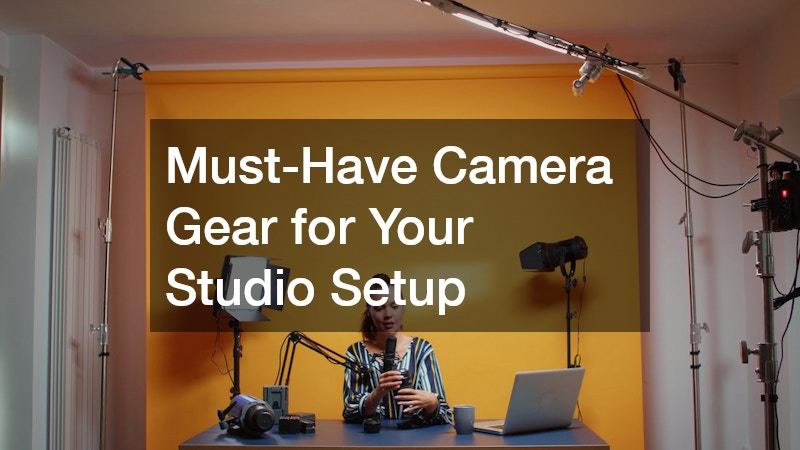
Must-Have Camera Gear for Your Studio Setup

Your camera is, of course, the centerpiece of your studio. But the right accessories can vastly improve your efficiency and image quality.
Camera Essentials:
- DSLR or Mirrorless Camera
- Full-frame models offer better depth of field, but crop sensors are fine for small studios
- Tripod
- Enables stability, especially for long exposures or self-portraits
- Remote shutter release
- Helps eliminate camera shake
- Tethering cable or wireless connection
- Lets you preview shots directly on a computer or tablet
Lenses to Consider:
- 50mm f/1.8: Ideal for portraits
- 85mm f/1.4 or f/1.8: Great for headshots with creamy bokeh
- 24–70mm f/2.8: Versatile for products, portraits, and full-body shots
Invest in glass over gear—upgrading lenses usually has a bigger impact than changing your camera body.
Audio and Video Tools (If You Plan to Create Content)
If you plan to shoot videos or record behind-the-scenes content, having some basic audio and video tools is a smart move.
Recommended Gear:
- Lavalier mic or condenser microphone
- Ring light or key light for YouTube setups
- Smartphone tripod or gimbal for BTS footage
- Basic editing software like Adobe Premiere Rush or iMovie
Video content can complement your photography portfolio and boost your social media presence.
Furniture and Layout Tips for a Productive Home Photography Studio
An effective studio setup isn’t just about gear—workflow and organization matter just as much. Make the space practical and comfortable.
Helpful Additions:
- Rolling cart or storage bins for gear
- Foldable table for flat-lay or product shoots
- Stool or posing chair for portraits
- Mirror for models or self-portraits
- Extension cords and power strips
Think about the flow—where your subject stands, where your lights are positioned, and where you’ll be shooting from. Avoid tripping hazards and maximize your available light.
How to Manage Power and Cables Safely
One overlooked aspect of a home studio is cable management. With multiple lights, chargers, and gear running, it’s easy to overload outlets or trip over cords.
Cable and Power Tips:
- Use surge protectors to prevent damage
- Label cords to keep track of equipment
- Use velcro straps or cable sleeves for organization
- Avoid daisy-chaining power strips
Always keep electronics away from water and high-traffic walkways. Good cable management is not only safer, but it also looks more professional to clients.
Editing and Post-Processing Workstation
A home photography studio isn’t complete without a proper post-processing setup. This is where your photos come to life.
Key Tools for Editing:
- A computer or laptop with high RAM and a fast processor
- Calibrated monitor for accurate color grading
- External hard drive or cloud backup system
- Editing software like Adobe Lightroom, Photoshop, or Capture One
Consistency in editing ensures your photos maintain a signature look, which is crucial if you’re building a brand or portfolio.
Budget Breakdown: How Much Does It All Cost?
The cost of building a home photography studio varies. Here’s a basic breakdown for beginners:
| Equipment | Estimated Cost (USD) |
| Entry-Level Camera & Lens | $600–$1,000 |
| Lighting Kit (2 Softboxes) | $100–$250 |
| Backdrop & Stand | $100–$200 |
| Tripod | $50–$150 |
| Reflector Set | $30–$50 |
| Editing Software (Adobe CC) | $10–$50/month |
| Miscellaneous (Storage, etc.) | $100+ |
| Total | ~$1,000–$1,800 |
This setup allows you to shoot portraits, products, or creative stills at a professional level from home. Scale your gear over time as your needs grow.
Common Mistakes to Avoid When Setting Up Your Studio
Before you hit “buy” on your equipment list, be aware of common beginner pitfalls.
Watch out for:
- Buying too much, too soon: Focus on essentials first
- Ignoring lighting: It’s more important than your camera
- Overlooking storage and cable safety
- Poor backdrop placement: Leave enough distance to avoid shadows
- Underestimating the value of editing software
A minimal setup done right is always better than a cluttered one filled with unused gadgets.
How to Maximize a Small Home Photography Studio
Limited on space? Don’t let that stop you. A small studio can still produce big results with thoughtful planning and clever gear choices.
Space-saving strategies include:
- Use collapsible backdrops and foldable light stands
- Invest in wall-mounted storage or pegboards for accessories
- Shooting tethered to a laptop eliminates bulky monitors
- Keep gear minimal and modular—buy only what you’ll use
- Use natural window light in place of softboxes when needed
Small doesn’t mean limited—it just means you need to be smarter about layout, mobility, and storage. Even a 6×6 foot corner of your room can be a powerful, portable creative zone.
Managing Heat and Ventilation in Your Studio
Photo equipment—especially lights—can generate significant heat, making long shoots uncomfortable or even unsafe. Good ventilation isn’t just about comfort; it can also prolong the life of your gear.
Keep your studio cool and safe by:
- Using LED lighting instead of incandescent or halogen (they run cooler)
- Opening windows or using a standing fan during breaks
- Installing an exhaust fan if your studio is in an enclosed area, such as a garage
- Avoiding direct sunlight that heats up your room too quickly
- Taking breaks every hour to reduce heat buildup and eye strain
Comfort enhances creativity. A well-ventilated and temperature-controlled studio helps keep both you and your gear performing at their best.
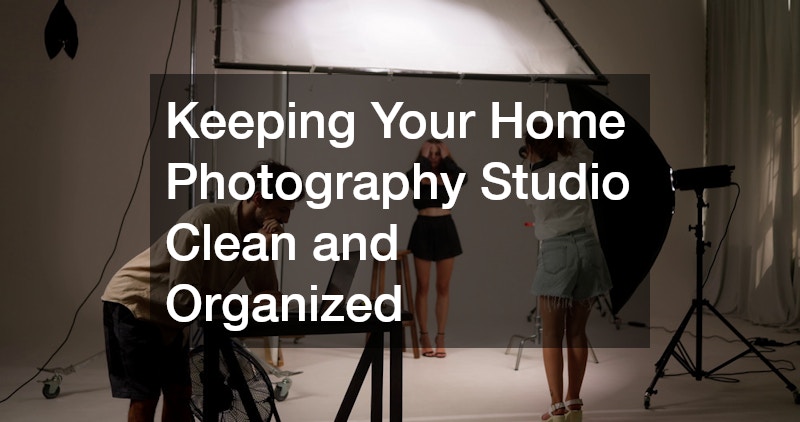
Keeping Your Home Photography Studio Clean and Organized

A tidy studio space isn’t just about aesthetics—it significantly improves productivity, safety, and professionalism, especially if you’re shooting clients.
Organizational habits to adopt:
- Label your gear cases and bins for easy access
- Clean your lenses and sensors before and after each shoot
- Keep a microfiber cloth handy for props and reflective surfaces
- Vacuum or sweep regularly to eliminate dust that can affect image quality
- Dedicate 15 minutes after every shoot for cleanup and reset
An organized studio is a productive one. Keeping your space clean also protects your investment in expensive photography gear.
Building Inspiration into Your Home Studio Design
While gear and functionality are critical, don’t underestimate the creative power of ambiance. A home photography studio should inspire you.
Ideas to boost inspiration and motivation:
- Hang your favorite prints on the walls to showcase your progress
- Use warm lighting or accent colors in non-shooting zones
- Create a vision board for photo shoot ideas or client mood boards
- Add indoor plants or natural textures for a relaxing feel
- Use a Bluetooth speaker to play music during shoots
Inspiration fuels creativity. Make your studio a place where you want to spend time and experiment with new ideas.
Final Thoughts: Start Simple, Evolve with Practice
Your home photography studio doesn’t have to be perfect on day one. Start with the basics—camera, lighting, backdrop—and gradually upgrade as your skills and needs evolve. The best studios are built over time, with a mix of creativity, smart investments, and personal touches that reflect your photographic vision.
Whether you’re shooting portraits, launching a business, or simply exploring your passion, having a dedicated studio space gives you the freedom to experiment and improve. Keep learning, keep shooting, and most importantly, enjoy the process.


